
Do you want to install and setup Google tag manager in your WordPress website?
Google tag manage allows you to integrate with many marketing and analytical services with your WordPress website. With the help of the Google tag manager tools you can analyse your website using different code snippets in your website.
Here in this article we will discuss about the importance of Google tag manager and show you the process to install and setup Google tag manager in WordPress website.
What is Google tag manager?
Google tag manager is tools which helps you to add many code snippets to your website to analyse your traffic, track the conversion rate and also collect different analytical data. With the help of Google tag manager you can easily do all this task from your dashboard very easily.
There are a lots of services available to analyse your website traffic movement and advertising like Google analytics, Google adds, Facebook Pixel. All of these services need to add some code snippets to your website to connect your account with these services.
Google tag manager offer you to add all of these code to your website from it’s interface whiteout edit your website code. It also offer you to add custom HTML code. So you can add your own tracking code too.
Install and setup Google Tag Manager In WordPress
Create Google tag manager account
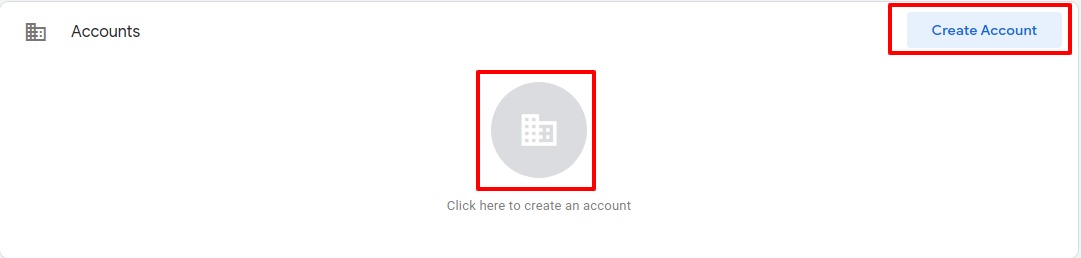
At first we need to create our Google tag manager account. To create account go the the Google Tag Manager page and click on the start for free button.

If you are logged in with your account then you can see the create account option. If you are not sign in then sign in with your Google account and click on the Create account option in the middle or top right corner.
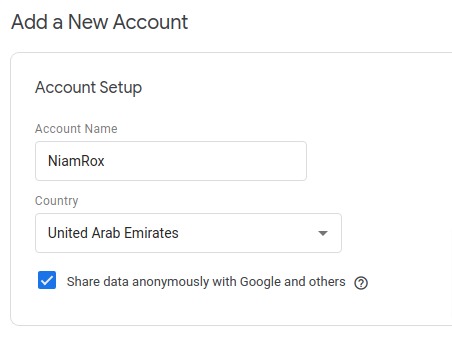
Now from the account setup filed add your account name and select the country. You can set your company name as your account name.
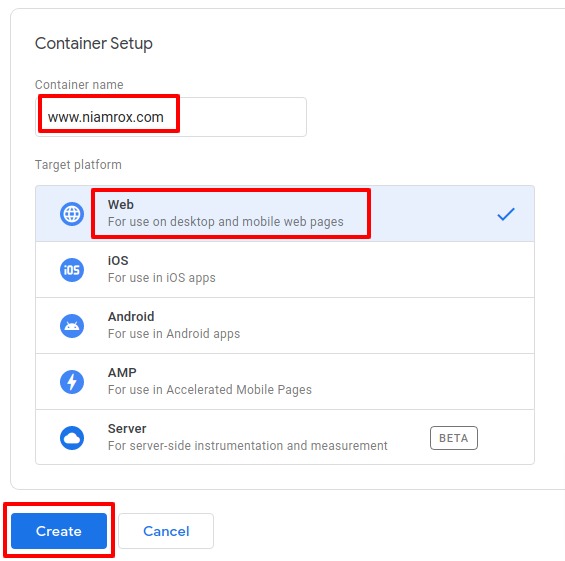
Now from the container field add container name and set the platform. Container is the tags so you can enter your website url as container and choose the platform as web.Click on the Create button to continue.
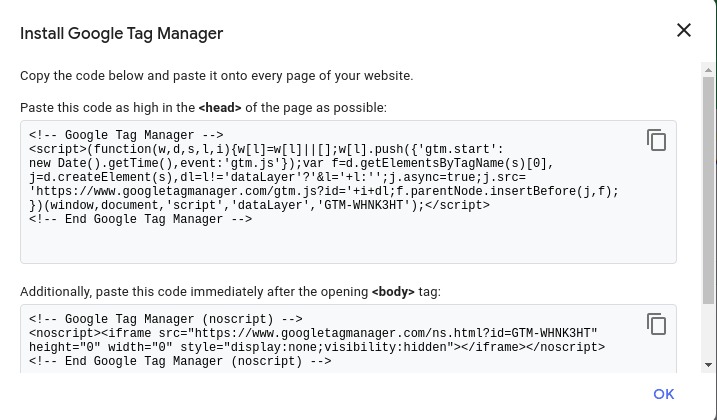
Now it will show you the terms and condition of Google tag manager you just need to accept the term and condition. After accepting the terms and condition a pop up window will show up where you can find the code snippets to install tag manager in your WordPress website.
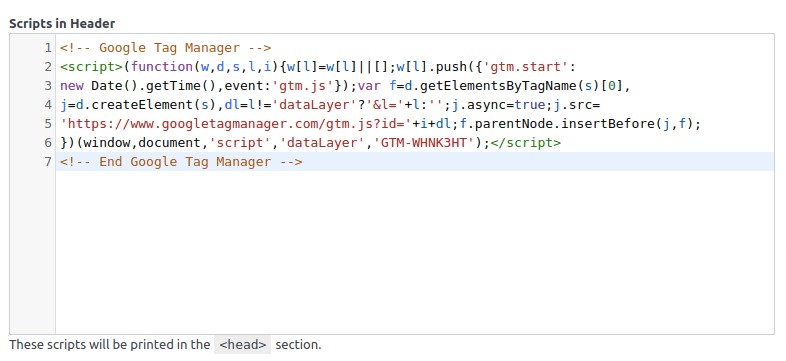
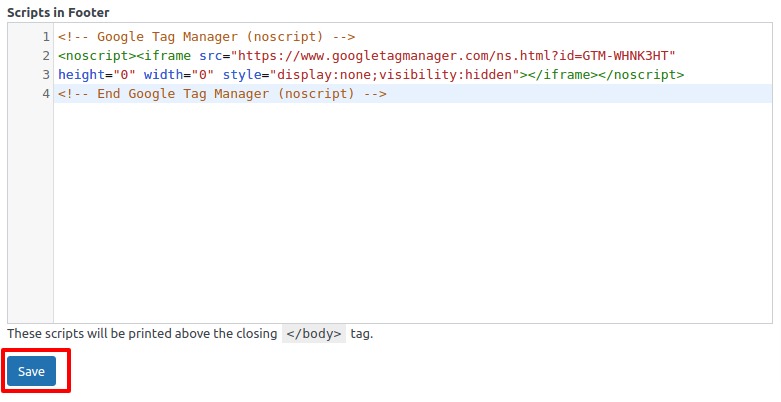
You can find two code snippets, the first one need to add in the <head> section of your website and the second one need to insert in the <body> section.
Add Google Tag Manager code in WordPress
After creating our account now it’s time to add connect the Google tag manager with WordPress. To add the tracking code you can use the Insert Headers and Footers plugin. Install and activate the plugin and go to Setting > Insert Header and Footer.
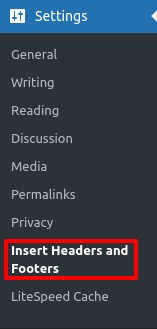
Here in Insert Header and Footer page you can see different boxed to add code in different area. From the header boxes you can add code in your website header area and in the footer boxes you can add in the footer area.
Now go to your Google tag manager page and copy the code for <head> tag and paste it into the header boxes of your website.
Similarly copy the other code and paste it into the footer box. Don’t forget to click on the save button.
It will install the Google Tag Manager to your WordPress website. Now you can use Google tag manager dashboard to
install any tracking code.
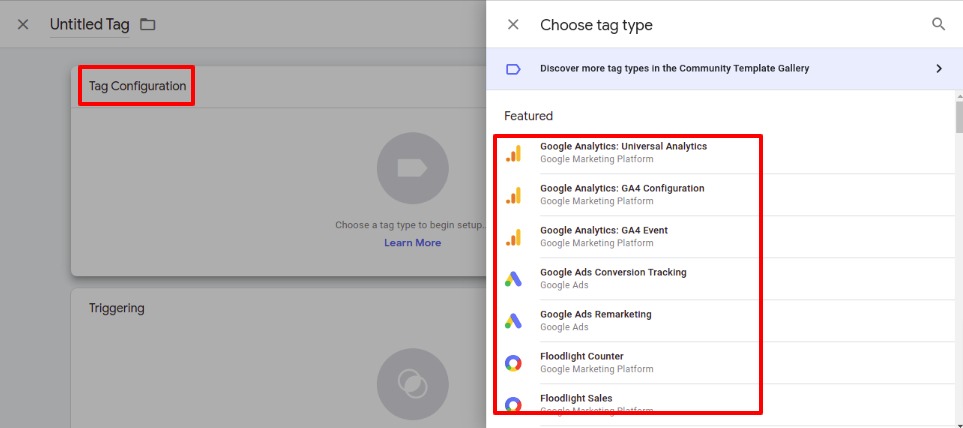
How to add and publish tag
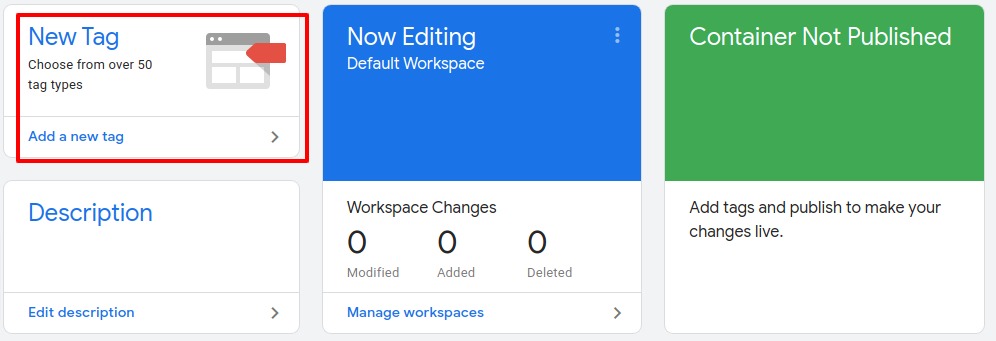
After successfully added your Google tag manager to your WordPress website you can add tag or code snippets from tracking services. Google tag manager provide support for different tag as well as you can add custom tag.
To add tag go to the Google tag manager website and click on the Add tag option.
Add a title of your tag and then from the tag configuring option choose the service you want to add.
After selecting the service from the choose trigger option select all pages and click on the Save button.

This is how you can add tag in your Google tag Manager.
We hope this article will help you. If you like this article please like our Facebook page. If you have any problem you can check our Website Maintenance services.