Are you trying to create a custom sidebar for each post and page in WordPress? There are a few methods by which you can create a custom sidebar for your website. By default, your website’s themes will show the same sidebar in the entire website pages and posts.
A sidebar is very important for any website to showcase all the important posts, widgets, plugins, and elements in one place. It depends on you, what you want to show in the sidebar you can customize for yourself. But the same sidebar is shown all over the website. When you have different types of articles or different types of pages then you need to display relevant elements on the sidebar based on that pages or posts. So here in this article, we will show you the easiest way to create a custom sidebar for each post and page in WordPress.
Why do we need to use a custom sidebar?
The same style sidebar for all the pages can make your website look less attractive whereas a custom sidebar will be a better choice. There are many reasons to use the custom sidebar, such as –
- With the use of a sidebar, you can utilize your widgets as elements. So if you have a specific sidebar for individual pages then you can utilize those elements based on that page’s content.
- With the help of a custom sidebar, you can add content personalization. You can display the information that is closely relevant to that page’s content.
- The custom sidebar can make your website unique and help your users to find related content easily which will increase audience engagement and lower your website’s bounce rate.
Create a custom sidebar for each post and page in WordPress
You can create a custom sidebar for each post and page with the help of a plugin. There are a few plugins that enable you to create your custom sidebar. Here in this tutorial, we are using Easy Custom Sidebars. Download and install this plugin on your website and activate it.
After successfully activating the plugin go to Appearance > Sidebar Replacement

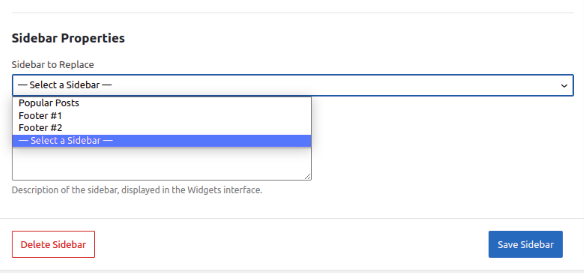
From this page give a name to your custom sidebar and click on the Create Sidebar button. After that go to the Sidebar Properties option. Here you need to select the properties where you want to replace your created custom sidebar instead of the theme sidebar. You can view your available option in the drop-down menu. Select it and provide a description on the Sidebar Description field.

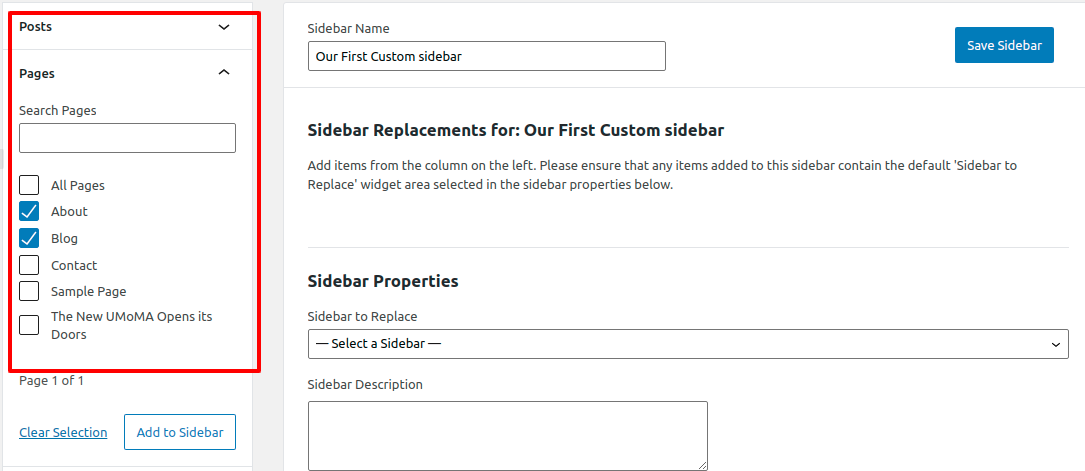
Now in the last step select the post or pages to add this custom sidebar. You can see all the options in the left column. You can select a specific post, page, category, tag, or author to add this sidebar. Just select it and click Add to sidebar option.

Your selected option is now added in the sidebar settings. Review it and don’t forget to click on the Save button. That’s it successfully created our first custom sidebar for individual pages or posts. Now let’s have a look at how we can add widgets in our created custom sidebar.
Add widgets to the custom sidebar
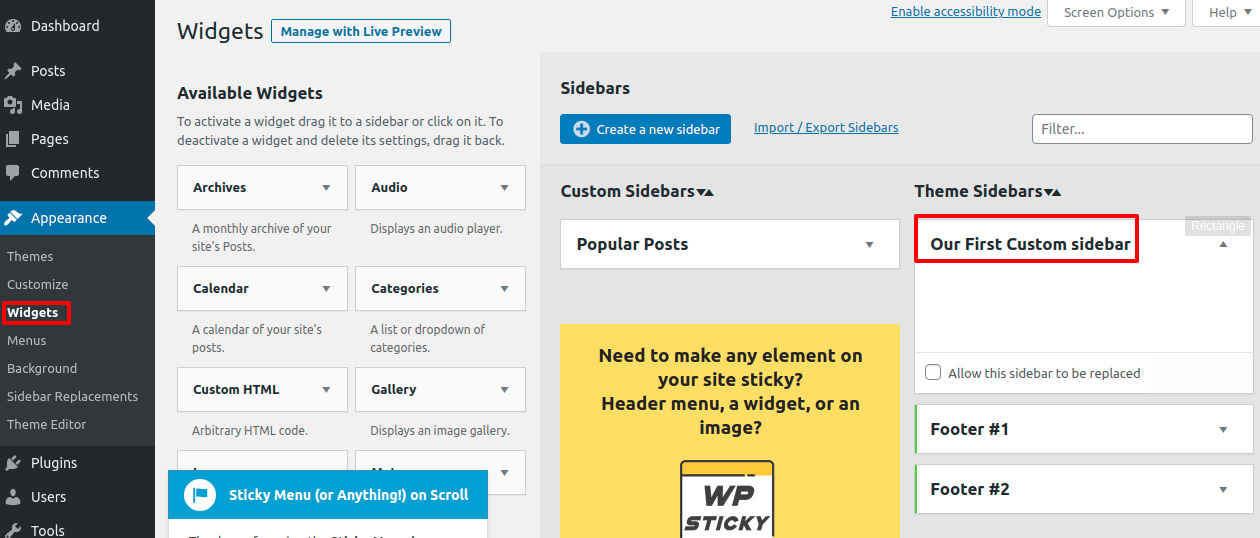
After creating and adding them in different places now our task is to add information in our sidebar. To add widgets go to Appearance > Widgets from the dashboard.

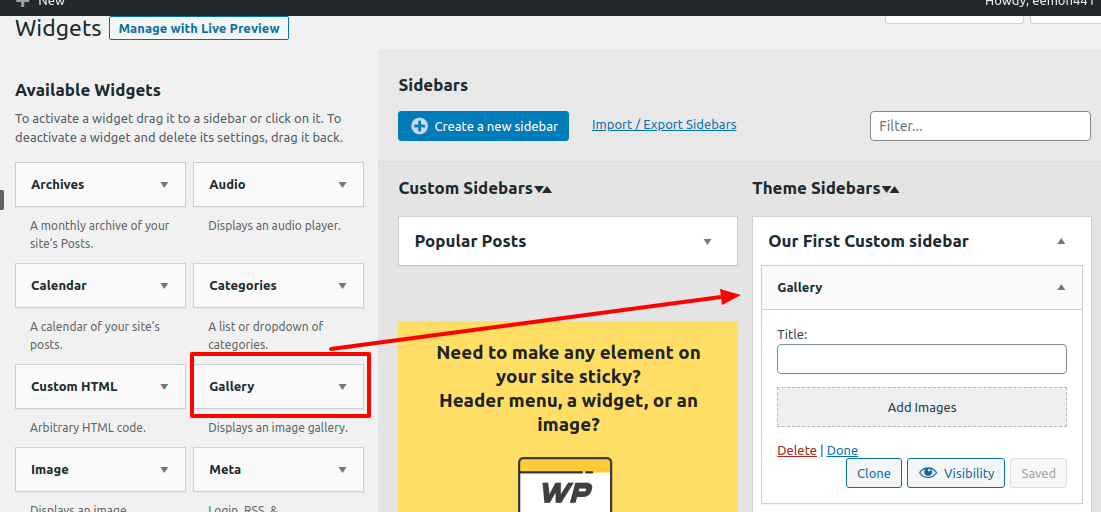
You can see your created custom sidebar option here. Now you need to add widgets. You can find your available widgets in the left column. Just drag a widget and drop it into the Our First Custom Sidebar area.
 The widget will now show in your sidebar. Now visit your selected pages where you assign the sidebar you can view your custom sidebar with widgets there.
Wrapping Up
Hope this article will help you. You can see our other articles to learn How to split WordPress posts into multiple pages.
How to add an HTML sitemap in WordPress
How to add a front-end login page and widgets in a WordPress website
If you like this article please like our Facebook page. If you have any problem you can check our Website Maintenance services. We will manage and customize your website professionally.


