
Do you want to change the “Proceed to Checkout” text in your WooCommerce shop? Here in this article, we will guide you to change the Proceed to Checkout text in WooCommerce.
If you are an e-commerce shop owner then you want to customize your product page, cart page, checkout page, and others to make your website different from others. There are many more things on WooCommerce you can edit and customize to attract the audience to increase your conversion rate.
Why do you need to change the Proceed to Checkout text?
The checkout button contains the text Proceed to Checkout by default on WooCommerce. This text is the default text and all the websites that use the WooCommerce plugin will display the same text. For this reason, many owners don’t want to use this text. They want to add some unique text to make their website different from others. The Proceed to checkout button is the last step for the users to purchase a product from your shop. So you need to optimize it as much as you can to attract them. You can optimize the text with more meaningful words and designs that can match your shop.
Changing a little bit here can make a better user experience that can help you to boost your conversion rate and audience engagement. To change the Proceed to Checkout text is a complex task as you need to edit the WooCommerce core files. For this reason, many users, especially beginners, don’t want to change the text.
So let’s see the procedure to change the check-out text in WooCommerce.
Change the Proceed to Checkout text in WooCommerce
There are two different methods to change the Proceed to checkout text on a WooCommerce website. You can do it manually or you can use a plugin for this purpose. Here in this tutorial, we are going to show you both methods. You can follow any of the processes that seem easy for you.
Change the Proceed to checkout text manually
To manually change the checkout text you need to edit the functions.php file of your website theme. Before editing the file you need to backup your website using any of the backup plugins. So if anything goes wrong you can retrieve your website data easily. Also, it is recommended to do the changes on a child theme. If you make the changes in the main theme the changes will disappear when you update the theme. But if you make the changes in a child theme then the changes will still remain even if you update the main theme. So suggest you make the changes in a child theme. If you are installed a child theme yet then you can see this tutorial to learn How to install a child theme in WordPress
When you have completed the above steps go to Appearance > Theme editor. It will open the theme editor file, look for the function.php file from the right dashboard.
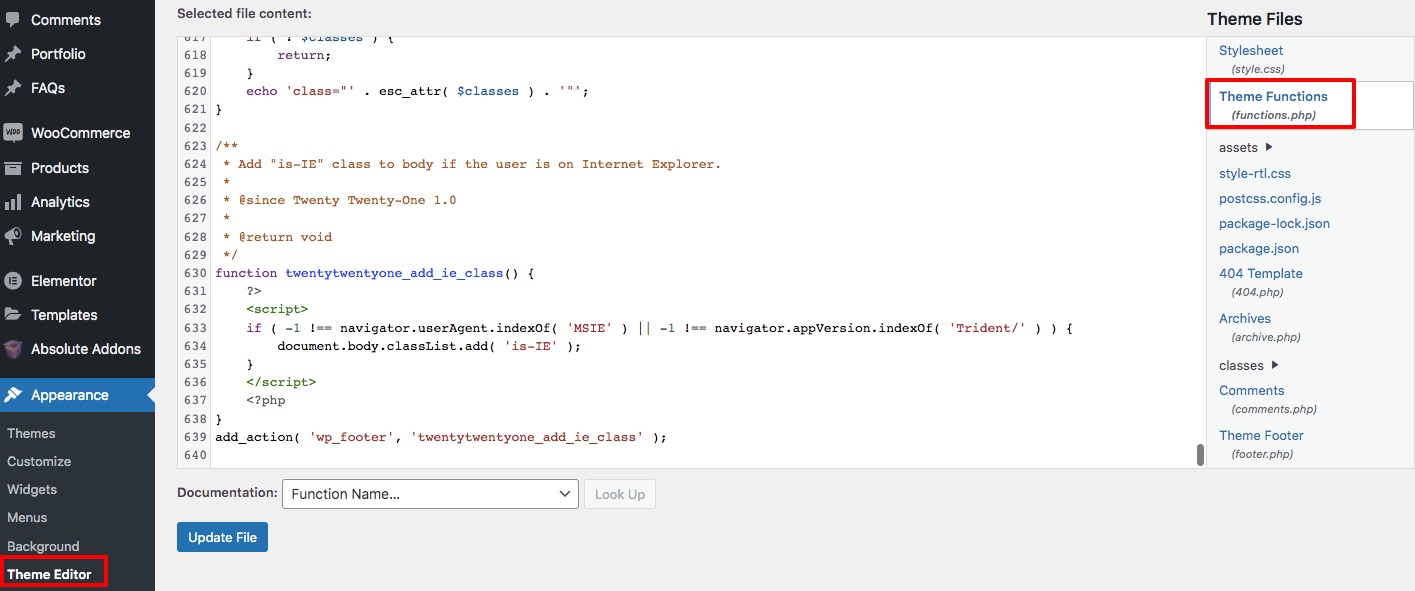
Now you need to add the following code snippets in your functions.php file. You can add your custom text instead of the “Checkout Text”.
function quadlayers_woocommerce_button_proceed_to_checkout() { ?>

<a href="<?php echo esc_url( wc_get_checkout_url() ); ?>" class="checkout-button button alt wc-forward">

<?php esc_html_e( 'Checkout-Text', 'woocommerce' ); ?>

</a>

<?php

}
This little code snippet in your functions.php file will change the Proceed to Checkout text to whatever you want. When you are done click on the Update button to save your changes. Now go back to your website and check the text yourself.
Change the Procced to checkout text using a plugin
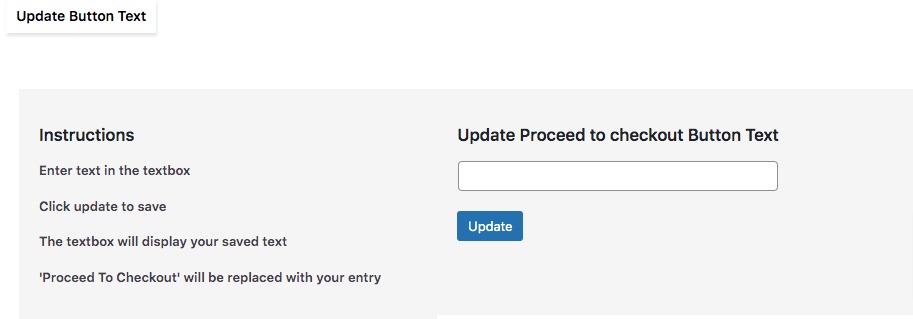
If you don’t want to edit your theme file then you can use a plugin instead. Here we are using the Change Proceed To Checkout Text WordPress plugin. Install and activate the plugin and then go to Settings >Change Proceed to Cart page. Here in this you just need to add the text in the field and click on the Update button. It will change the default text with your added ones.
Wrapping Up
Following the process, you will be able to change the Proceed to Checkout text in your WooCommerce shop. You can see our other articles to learn How to add subscriptions to the WooCommerce shop
How to display related products on WooCommerce
How to Setup Shipping Classes in WooCommerce
We hope this article will help you. If you like this article please like our Facebook Page to stay connected.