Looking for a way to create a temporary WordPress login for your website? Don’t worry you are at the right place, here in this article we will guide you to the easiest way to create temporary WordPress login.
When do you need to create a temporary WordPress login?
Temporary WordPress login will be disabled after a certain period of time. You can set the time as a few hours or a day, after the selected time the user won’t be able to login to your WordPress website. Another feature of this temporary login is that you don’t need to create a username or password. The user can access your website backend just only using the URL you provide. The URL will take them to your WordPress website backend without a username and password.
There are many scenarios where you need to create a temporary login. For example, you are facing a problem on your website and you need to give administration access to one of your developers. Instead of giving the developer an administrative role, you can easily create a temporary login URL. Your developer can access your website for the period of time you offer.
So you don’t need to create an account and then delete them. Just create a temporary login and after some time the access will be disabled automatically. These features will help you to troubleshoot and debug your website.
Create temporary WordPress Login
There are different ways you can create a temporary WordPress login. Here we will try to cover all the possible ways to add users and temporary WordPress login.
Admin Dashboard
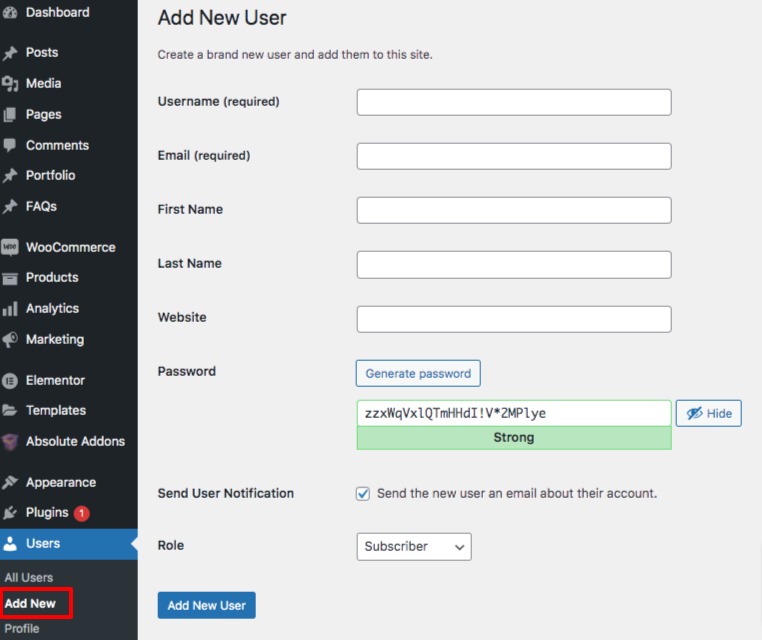
This is the quickest and easiest process to add a user but it won’t create a temporary WordPress login. After adding your user you need to delete the user manually. Login to your WordPress admin dashboard and then go to Users > All Users > Add New page. Here on this page, you can add a new user to your website.
Here you need to add the username, email address and set the user role for the user. This will send the user an email to notify. But here in this process, you need to delete the user manually.
Create a user programmatically
You can also create a user manually by adding some code snippets on your website function.php file. As you are adding code on the function.php file so you suggest you create a backup of your website. So if anything goes wrong you can get back your website data from the backup. There are many backup plugins available. You can use any of the plugins to make a backup of your website.
To add code you can use a code snippets plugin. It will provide you with easy access to add code to your website. If you are not adding code on your website before then you can see this article to learn how to add code snippets. Now you can add the following code directly to your function.php file or with the help of the plugin to add a user.
wp_create_user( 'Will', 'password', '[email protected]' );
Here you can replace the code with your username, email, and password. This method does not also remove the user automatically. You need to manually delete the user by removing the code. So following the next process to properly create a temporary WordPress login.
Create temporary login using a plugin
Using a plugin you can properly create a temporary login that will remove the user access automatically after a certain period of time. Here in this tutorial, we are using the Temporary Login Without Password plugin.
Install and activate the plugin and then go to the Users > Temporary Logins page to configure the plugin. First, you need to create a login by clicking on the Create New button.

Here you need to add the following info –
- First Name
- Last Name
- Role
- Redirect after login
- Expiry
- Language
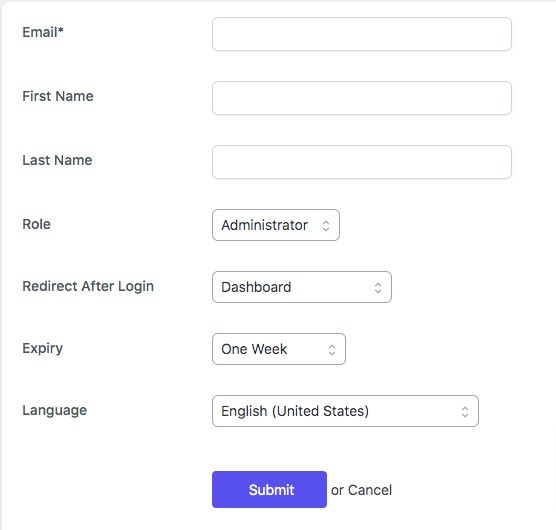
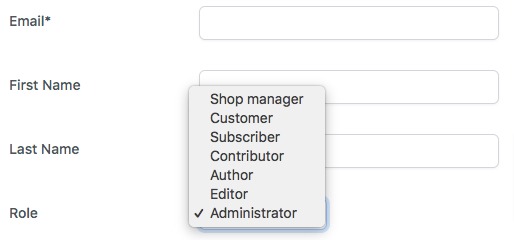
In the email field, you need to add the user’s email address. When the user tries to access your website WordPress will verify the email address. So this field is very important, without the exact email address the user won’t be able to access your website. You can set the user role from the Role dropdown menu. It will display all the roles you have on your website.
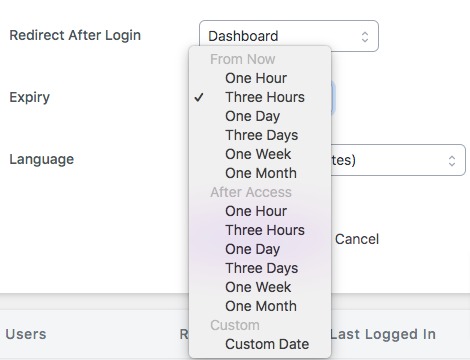
From the Redirect After Login dropdown menu you can set the page where the user will redirect to. After that, you can set the time duration from the Expiry dropdown menu. You can set the expiry date as hours, days, weeks, or months. This plugin will also let you set your custom time period.
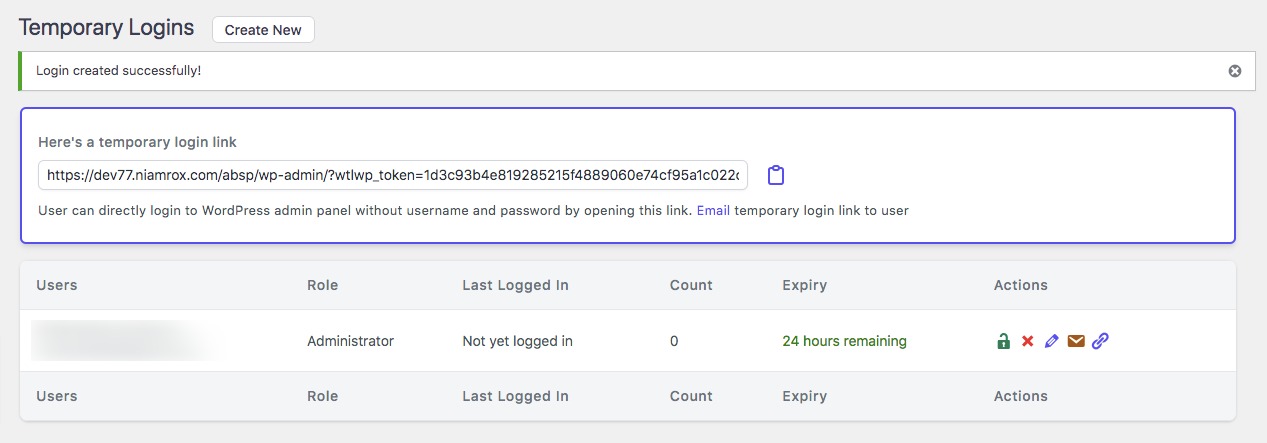
In the end, you can set the language. When you are done click on the submit button to create a temporary user. After clicking on the submit button it will redirect you to the plugin page where you can see the list of your created user with a temporary login link. From the list, you can copy the URL or edit the user. You can also disable a user if you want.
Wrapping Up
Following the process, you will be able to create a temporary WordPress login. You can see our other articles to learn How to organize files in the WordPress media library
How to update the WordPress theme without losing customization
How to properly rename categories in WordPress
We hope this article will help you. If you like this article please like our Facebook page.


