Call to action button is very important for any business to redirect the user for any specific task. You can add a button in your slider and it will redirect the user to another page. If you sell any service or products then you can add the CTA button with the download or buy link. So it will be a very good user experience for your visitors. Adding a Call to Action Button under Slider in WordPress can increase your audience engagement and conversion rate.
Here in this article, we will show you how easily you can add the Call to Action Button under the Slider in WordPress using Soliloquy Slider Plugin.
Initially, you need to install and activate this plugin on your website. After activating you need to create a slider.
Create Slider
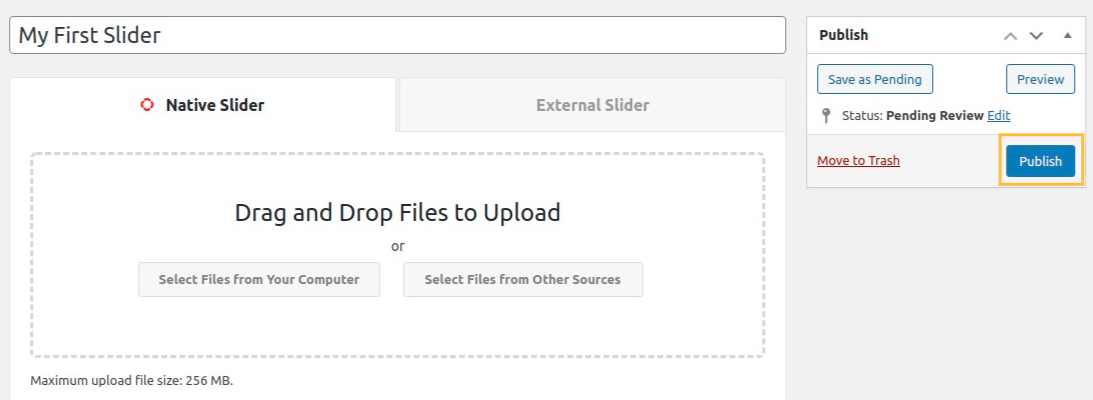
Go to your WordPress dashboard then Soliloquy » Add New. Give a title of your slider and add some images for the slider to show. You can drag and drop images from your local file directory or can browse images. After adding the images just click on the publish button.
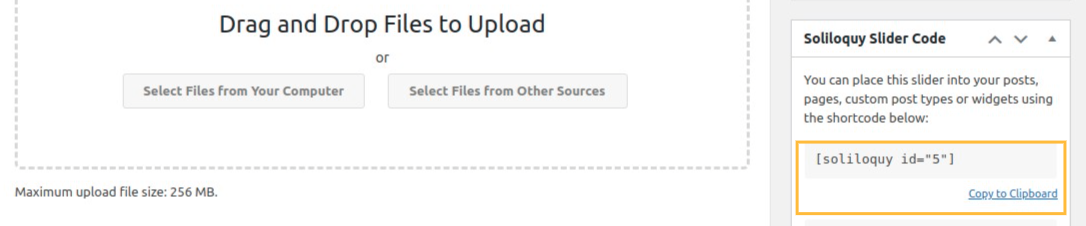
After publishing the slider on your right side screen some code and information will appear. You will need this information later to add this slider to any pages or posts.
Install and Activate Soliloquy’s Custom CSS Addon
Custom CSS addon is necessary to add CTA in the WordPress slider. We need Soliloquy’s custom CSS addon to create our CTA in our slider. From the dashboard go to Soliloquy > Addons then install and activate the Custom CSS addon.
Add CSS to Create a Call-to-Action Button
In the Soliloquy slider Misc tab, we will find the field to add Custom CSS code. Just add this little code snippet there.
soliloquy-container .soliloquy-caption .soliloquy-caption-inside {
   background:none !important;
   background-color:none !important;
   text-shadow: none !important;
}

.soliloquy-caption-inside a {
   width: 200px;
   display: block;
   background-color: red;
   padding: 10px 15px;
   margin-bottom: 200px;
   border-radius: 3px;
   color: #ffffff;
   text-decoration: none;
}
.soliloquy-caption-inside a:hover {
   width: 200px;
   display: block;
   background-color: black;
   padding: 10px 15px;
   margin-bottom: 200px;
   border-radius: 3px;
   color: #ffffff;
   text-decoration: none;
}
Add HTML for Call-to-Action Button
Now we need to open the image tab of our slider and then need to edit the metadata of the image. Click on the modify image slide option and a new window appears. We need to add this code in the caption field.
<a href="http://www.domain.com/">Call-to-Action</a>
replace ‘domain.com’ with your website domain name and you can change the Call to Action text. We have to repeat this step for all the images you have in our slider. That’s it we have our CTA button in our slider.
Add slider to any page or post
In our First step, we mentioned some code and information to remember to add a slider in any post or page. Copy that code and open a post or page in the editor and paste that code and publish the page or post. Now go to your website and you can see your slider with a call to action button in action.
Wrapping Up
Following the process, you will be able to able to add a call to action under the slider in your WordPress website. You can see our other articles to learn How to allow users to moderate comments in wordPress
How to enable Inner Blocks in your Gutenberg Block
We hope this article will help you. If you like this article please like our Facebook Page to stay connected.