Adding a Navigation Menu to the Sidebar in WordPress is very useful if you want to add some additional site navigation. It depends on your website goals and focus, whether you need an additional sidebar or not. In general, most blog, news, and magazine website owners are using sidebar navigation to display links to tags, and categories so that the visitors can easily find their desired topics.
WordPress offers you so many features and elements to add to your website sidebar. You can easily edit and customize your elements in the sidebar using the WordPress dashboard. WordPress has built-in widget functionality which helps you to create the main navigation menu in your sidebar with a drag-and-drop option. Also, you can add essential elements like tags, categories, and recent posts in your sidebar easily.
There are a lot of plugins available which help you to create a costume navigation sidebar for individual pages on your website. You can create a sidebar for your service page and also create a different sidebar for the Contact Us pages. The specific page will have its own costume sidebar.
Add a Navigation Menu to the Sidebar in WordPress
You can easily add a navigation menu to your WordPress website using the WordPress dashboard. Login to your WordPress website and go to the dashboard then-
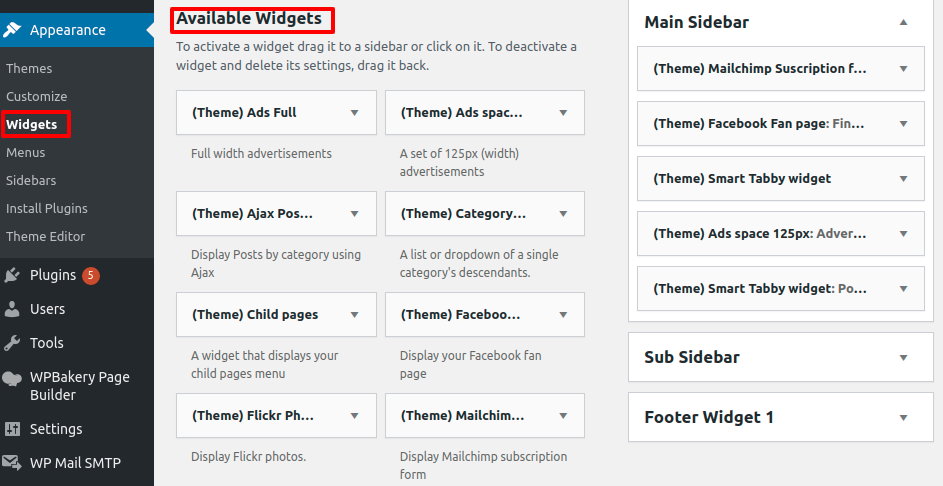
- Go to Appearance > Widgets
- Under the available widget area find the navigation menu you want to add.
- Drag and drop the menu into the main sidebar widgets area
- Add the name of the menu and select from the drop-down where you want to use it.

Create a custom sidebar for the WordPress website
There are a lot of plugins available for the custom sidebar navigation menu. Here in this tutorial, we are using the Custom Sidebars — Dynamic Widget Area Manager plugin to create our custom sidebar for specific pages. This plugin offers you so many customization options. With the help of these plugins, you can create multiple sidebars for multiple pages.
Download this plugin from the WordPress plugin page and activate it. after activating the plugin go to your dashboard and then Appearance > Widgets. If the plugin is running successfully then you will be able to see the option Create a new sidebar

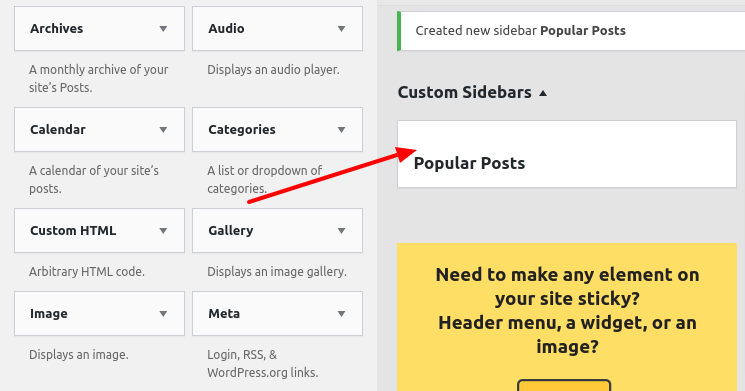
From this page, you can choose the name of your sidebar and add some description about it. If you want to create multiple sidebars then you should give a related name for each sidebar so that you can easily understand which sidebar is for which purpose. You can see all of your sidebars in the custom sidebar section

Now from the Available Widgets area, you need to drag and drop the element you want to display in your sidebar.

Select Location for New Sidebar
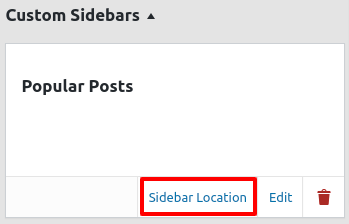
The sidebar will not show on your website until you set the location and tell the plugin to display. To set the location of the sidebar again go to Appearance > Widgets > Custom Sidebars.
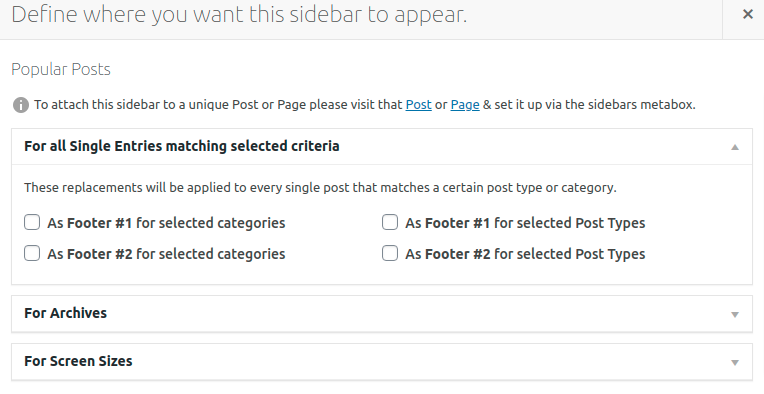
Click on the sidebar you want to set location and then click on sidebar location.
 After that, you have some options to choose from the sidebar or footer option. After selecting the option save your changes.
Add a sidebar in any specific page or post, you need to edit that specific page. When the plugin is activated new sidebar widgets will be available for your new and existing posts and pages. You need to pick the custom sidebar(s) you want for the available locations

Conclusion
It’s not a good idea to create the same sidebar structure for all of the pages and posts. You can create a custom sidebar to offer extra elements related to that particular page or post. It also helps your users to navigate your site easily which is a very good user experience.
We hope this article will help you. You can also see our other articles to learn How to Add a Request to the Callback Form in WordPress
How to Create Custom Taxonomies in WordPress
If you like this article please like our Facebook Page to stay connected.


