Do you want to enable maintenance mode in your WordPress website? Maintenance mode is very important when you add any modification or update your website. If you are not enabled the maintenance mode, then when a user comes during your maintenance season they will see a broken page that will create a very bad impression about your website.
On the other hand, maintenance mode will show a visual message to the user so that they can easily notify your user that your website is getting updated. It will create a very positive impression. So here in this article, we will guide you to enable maintenance mode in your WordPress website.
Why and when do you need to enable maintenance mode?
In normal customizations like publishing content, updating themes and plugins, you don’t need to enable maintenance mode. You can do these types of minor tasks without any downtime. But sometimes you need to customize your website for a long time like configure new features or plugins, change the themes or design of your website that takes a long time, or break your website. For these types of situations, you need to enable maintenance mode.
You can avoid this situation by creating a staging website where you can customize or edit everything you need without impacting the main website. When you are done you can push the update to the main site.
Enable maintenance mode in WordPress
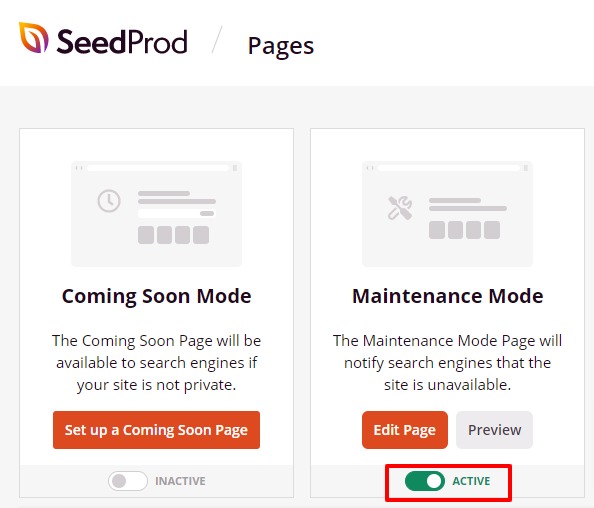
The easiest and quickest way to enable and create a maintenance mode page is to use a plugin. SeedProd WordPress plugin is free and offers you to easily create maintenance mode pages, 404 pages, and others. Install and activate the plugin and go to SeedProd > Pages. 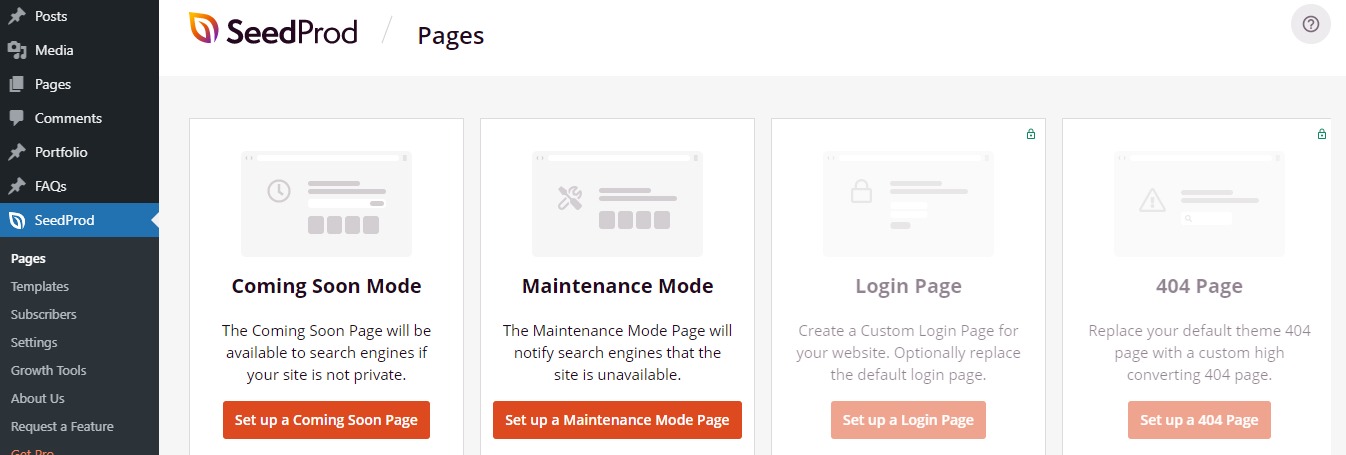
From here you can set up your coming soon and maintenance mode page. This plugin also offers you to set up a login and 404 pages, but for this, you need to use the premium version.
Open up the Setup Maintenance Mode option and you can choose the template. You can choose a blank template and customize it as you want. ShedProd offers drag and drop features to customize the element.
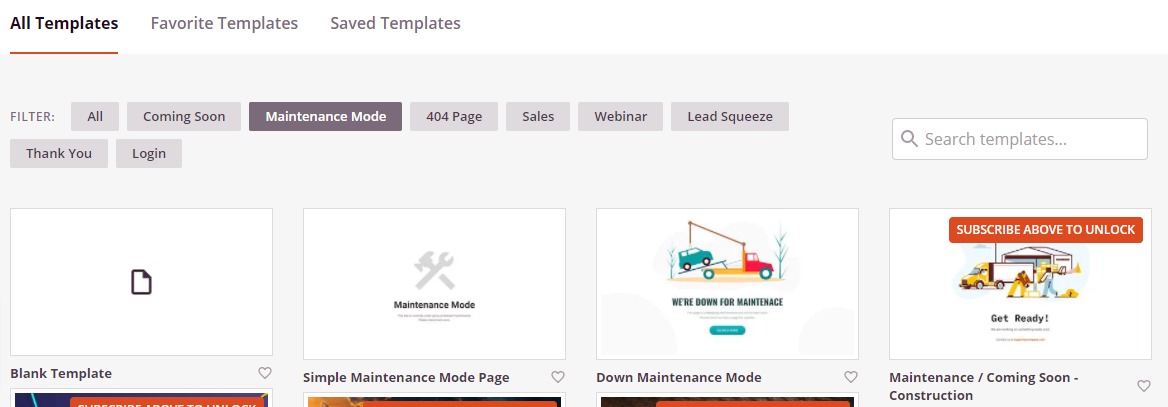
Hover your mouse over and click on any of the templates to customize it. You can change every element you want. When you are done with editing click on the Save button.
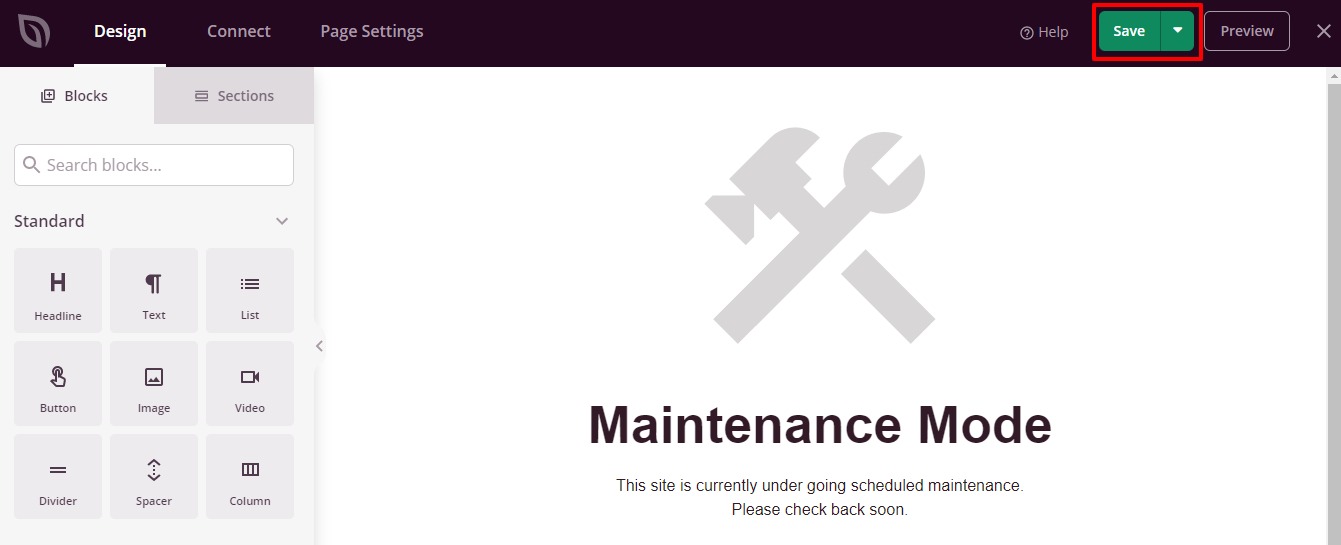
Now your template is ready. Again go to SeedProd > Pages and activate the maintenance mode toggle. It will turn your website into maintenance mode.
Controlling website access
If you are running a membership website then you need to control who can access your website during maintenance mode. To restrict user access during maintenance mode, go to SeedProd > Pages and click on the Edit Page button of the Maintenance Mode.

Now move on to the page settings tab and click on the Access Control option. The Access Control option is a pro feature. So you need to activate the pro version for this option. From here you can select the user role to access your website during maintenance mode. If you set the user role as Administrator then only the website administrator can see access to the website during maintenance mode.
Wrapping Up
Following the process, you will be able to enable and customize the maintenance mode in your WordPress website. You can see our other articles to learn How to get an uploaded image URL in WordPress
How to change or remove ‘Howdy Admin’ text in WordPress.
How to create a short link in WordPress.
We hope this article will help you. If you like this article please like our Facebook Page to stay connected.