Do you want to create a sticky floating navigation menu in WordPress? A sticky navigation menu scrolls with the screen when you scroll the page. These features allow the menu to always be visible to the users which is a very good user interface. Here in this article, we will guide you to create a sticky floating navigation menu in your WordPress website.
Importance of sticky navigation menu
The top navigation menu contains all the important pages and links to your website. Most of the website owners add the most important information through the top navigation menu. When you are using a normal menu it will invisible when you scroll the page. But a sticky floating menu will be visible all the time so the users don’t need to scroll from bottom to top to see the meu. This can help you to increase audience engagement and conversion on your website.
There are many WordPress themes available with the sticky floating menu. You can enable or disable the features from Theme > Customize options. If your theme does not have the features don’t worry we are here to guide you.
Create a sticky floating navigation menu in WordPress
There are different ways to create a sticky floating navigation menu. You can create it by using a plugin or you can do it manually.
Use a plugin
Using a plugin is the easiest and quickest way to create a sticky floating navigation menu. Here in this tutorial, we are using the Sticky Menu & Sticky Header WordPress plugin. Install and activate the plugin and then go to the Setting > Sticky Menu page to configure the plugin.
Here you need to add your menu CSS ID which you want to create sticky. To get the CSS ID to go to your website and right-click on the navigation menu and then click on the Inspect option. Using the Inspect tolls you need to find out the CSS ID of your selected navigation menu.
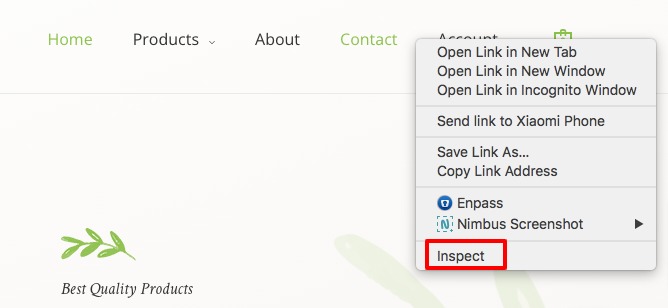
Now you need to find your navigation menu code. The code should look like this –
<nav id="site-navigation" class="main-navigation" role="navigation">
If you are not able to find the nav id then place your mouse in a different line of code and it will highlight the place in your website. When it will highlight the full part of your navigation menu there you will find the nav id.
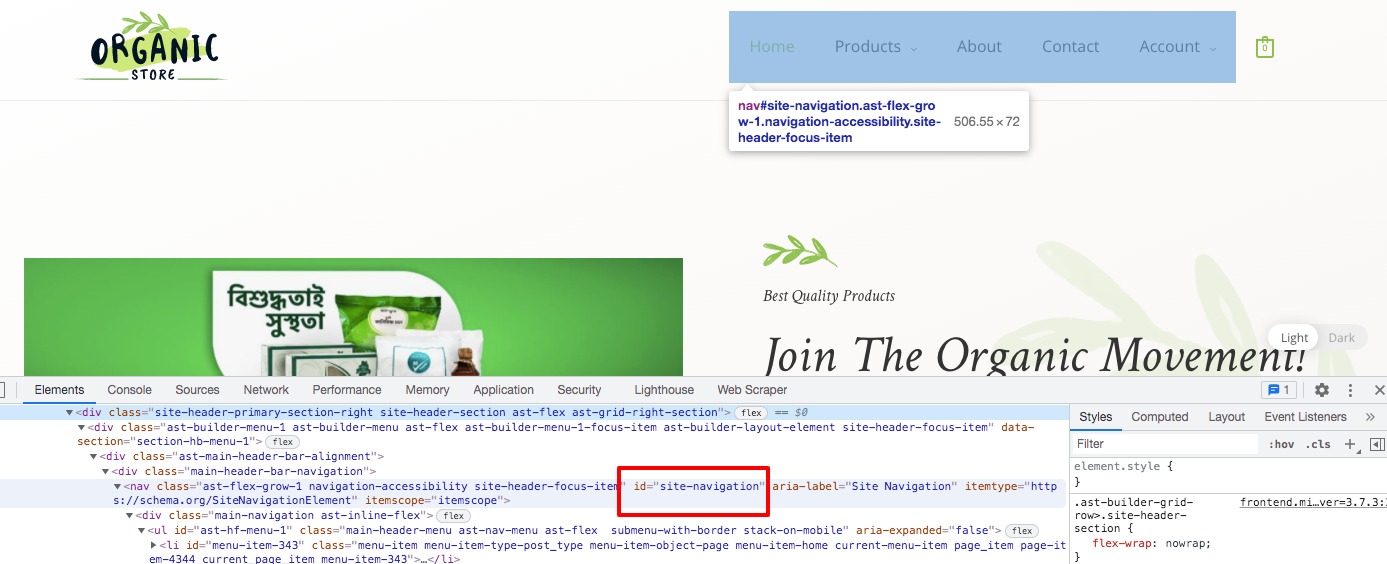
Here our nav CSS id is “site-navigation“. We need to add this id to the plugin configuration page. Here we will add “#site-navigation”
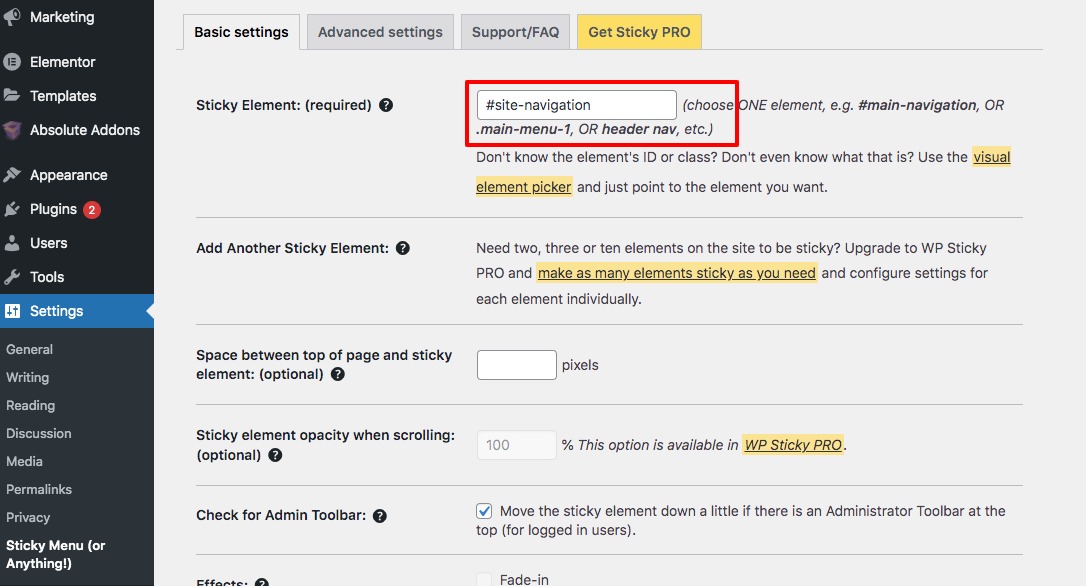
After adding the CSS id click on the Save Changes button.
Now go back to your website and refresh the page. Your navigation menu will scroll with you.
Customize sticky navigation menu screen
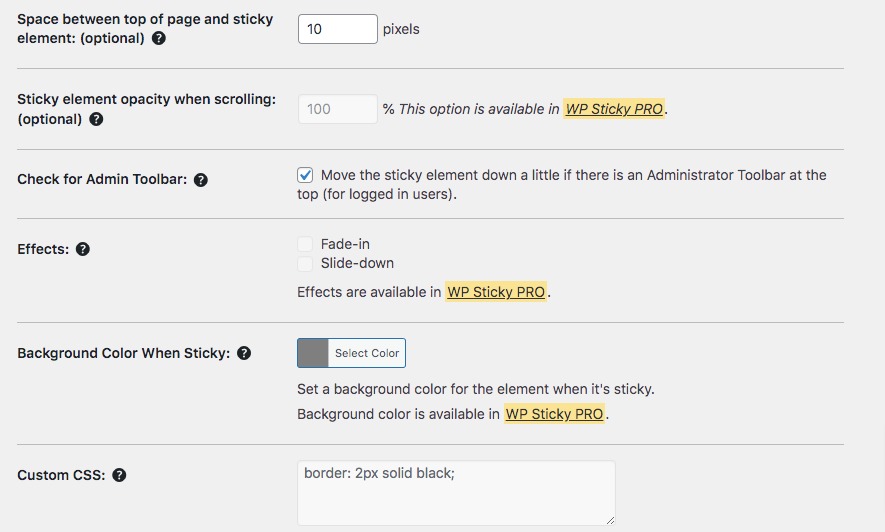
After creating a sticky navigation menu, now you need to customize how the navigation menu screen will look on your website. You can customize the screen from the plugin setting page. You can add the space between the top of the page and the sticky element in pixels. After that, you can add effect as –
- Fade in
- Slide down
You can also add a background color and custom CSS if you need. To use some customization you need to activate the pro version.
Add a sticky navigation menu manually
If you don’t want to use a plugin then you can add the sticky menu manually. For this, you need to add custom CSS. To add custom CSS go to Appearance > Customizer page where you will find the theme customizer option. Click on the custom CSS option and add the following code to it.
#site-navigation {
    background:#00000;
    height:60px;
    z-index:170;
    margin:0 auto;
    border-bottom:1px solid #dadada;
    width:100%;
    position:fixed;
    top:0;
    left:0;
    right:0;
    text-align: center;
}
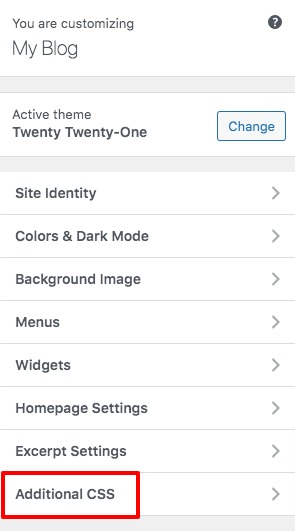
Here you need to change the CSS ID of your navigation menu and you can change the background color as you want. Click on the Publish button and go back to your website to see your sticky navigation menu in action.
Wrapping Up
Following the process, you will be able to create a sticky navigation menu for your WordPress website. You can see our other articles to learn Beginner’s Guide create a full-width page in WordPress.
How to remove or add capabilities to user roles in your WordPress website.
How to remove WordPress version number from your website.
We hope this article will help you. If you like this article, please like our Facebook Page to stay connected.

