
Do you want to add an email subscription to your WordPress website for free? Email marketing is one of the best ways to get targeted audiences. It also helps you to generate less for your website. There are different ways you can promote your website with email marketing and some of the ways are totally free. It doesn’t cost you anything to promote your website. When you are launching new products or creating a discount on your existing products, you can easily notify your users about it using email marketing.
If you don’t have much budget and want to set up email marketing tools for your website then Mailchimp is the best tool for you. Setting up Mailchimp in your WordPress is not so difficult. You can easily integrate it with your WordPress website. Mailchimp offers your attractive, beautiful, and user-friendly email sign-up form for your WordPress website. The best thing is that it is free to integrate Mailchimp into your WordPress website. So let’s see the easiest way to add an email subscription to your WordPress website for free.
Add email subscription to your WordPress website for free
There are three easy steps to add an email subscription to your WordPress website for free.
- Create an account to Mailchimp
- Creating an email campaign
- Creating an email subscription form
Create an account to Mailchimp
Mailchimp will offer you an email subscription for free if you have less than 2000 users. If you have more users then you need to choose a pro plan. But for begging you can when you have some moderate users then you can easily use the free plan of Mailchimp.
Go to the Mailchimp website and then go to the pricing page. Here on this page, you will see different pricing packages. You need to click on the Sign Up for Free package.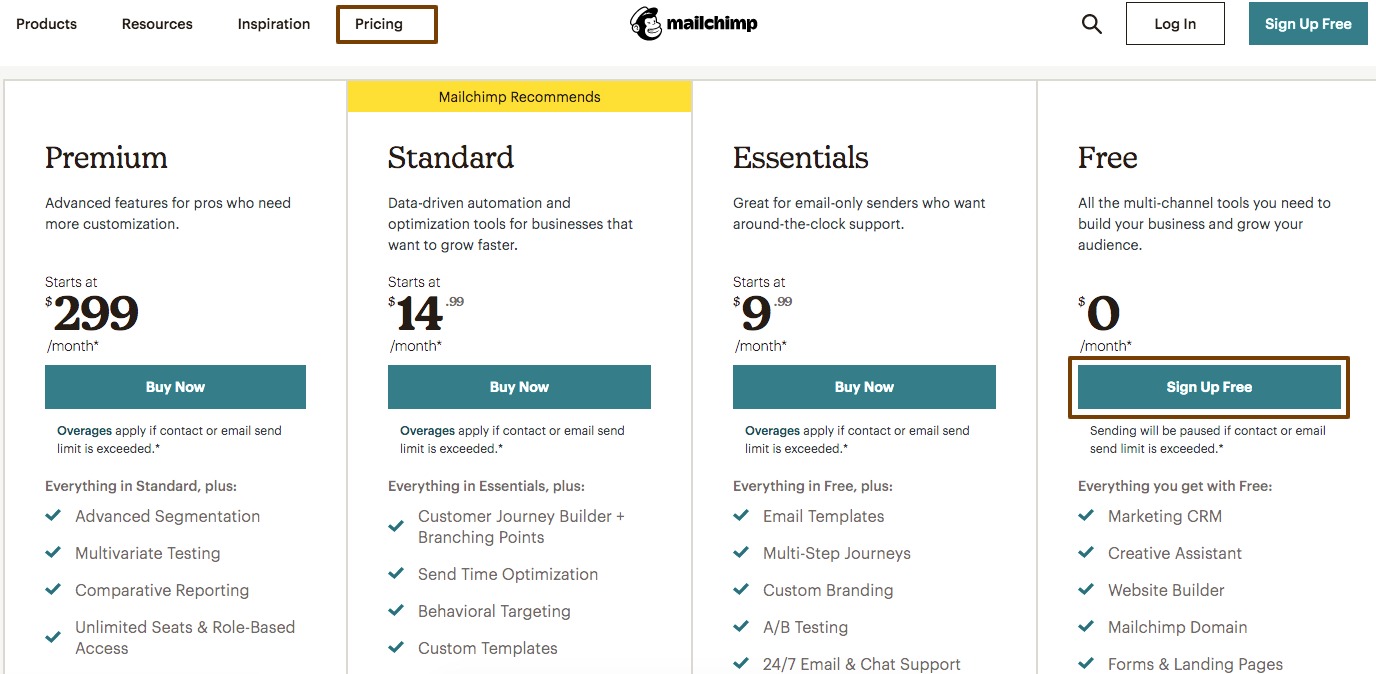
Now you need to add your account information and activate your account. After that, you need to set up your account under the free plan. Here you need to add your company details and physical address.
Creating an email campaign
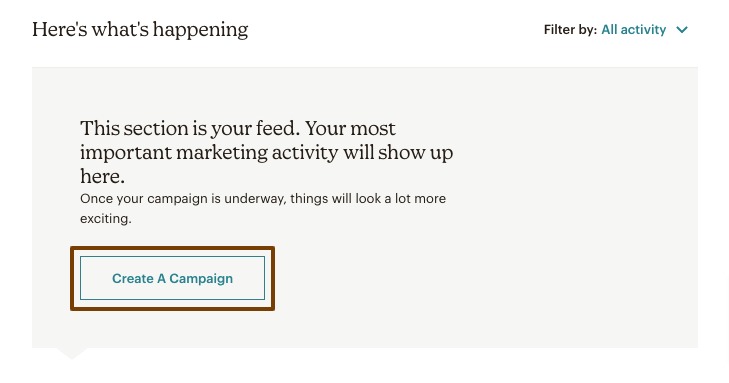
When you are done with setting up your account you need to go back to your Mailchimp home page and create a campaign. Click on the Create a Campaign button.
It will open up the campaign setting page from there first, you need to choose the campaign type. Under the email menu from the left dashboard, you can choose the campaign type. There are three types of campaign type available –
- Regular – It will design and send regular emails to your contacts
- Plain Text – It will design and send plain text emails to your contacts
- Template – It will offer you to create your own template or a predefined template to email to your contacts
Choose any of the template types and then you need to add your campaign name.
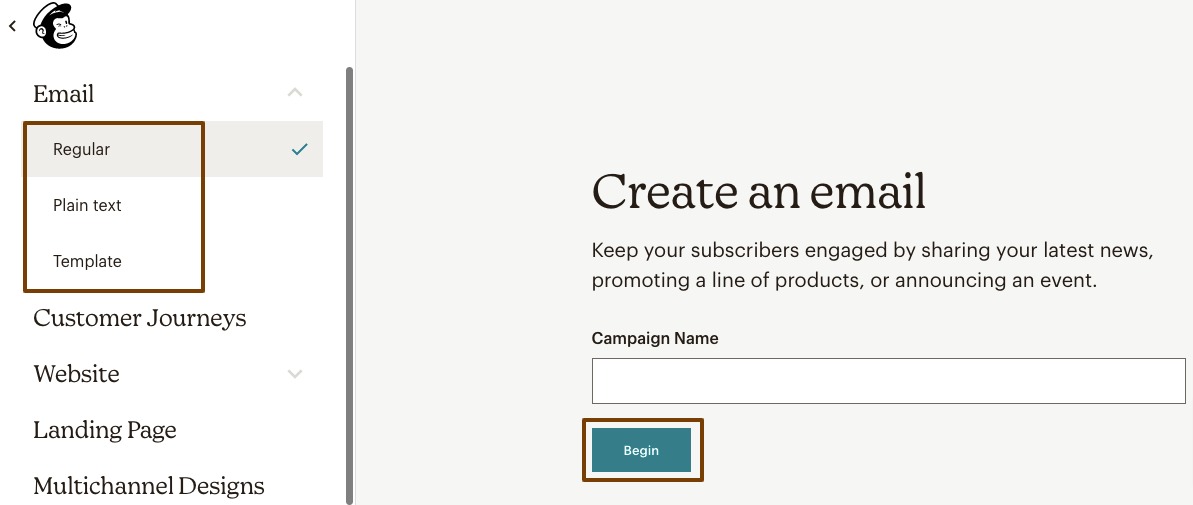
Add your campaign name and click on the begin button. Here you add our campaign name as “Email Subscription”. Now it will open another page where you need to set up your campaign.
First, you need to add the recipients you need to send the email to. From the To option, you can add your company and the recipients.
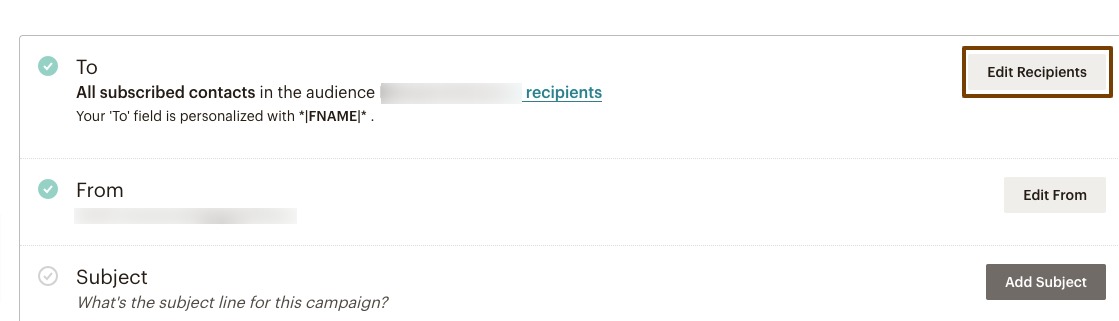
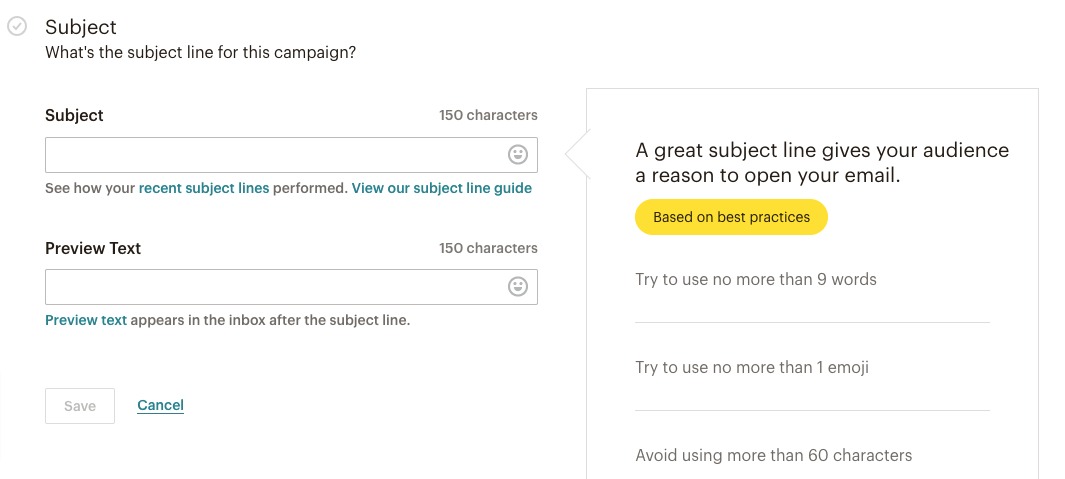
After adding your recipient’s move on to the form option where you need to add the name and email from the email will be sent. Simply add the name and email to the field. Next, you need to add a subject and preview text for your email.
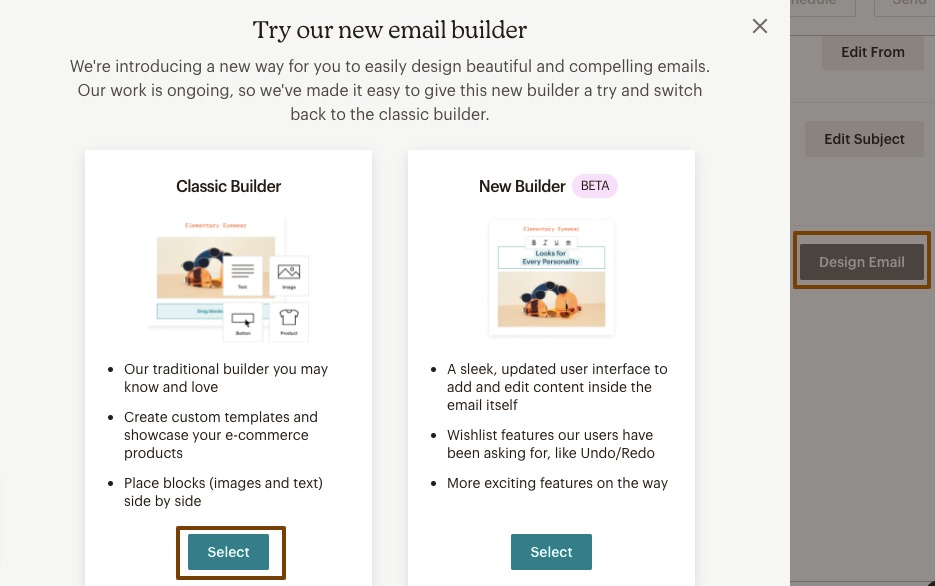
Finally, you need to add content to your email. Click on the Design Email button on the content menu and Mailchimp will show you two email builders to create your content. You can choose the classic builder or a new builder which is now in the beta version.
Here we select the classic builder and now it will show you the template library. You need to choose a template that can match your brand. Click any of the templates and then you need to edit the template with your content. Using the template editor you can edit the template easily with your preferable images and content.
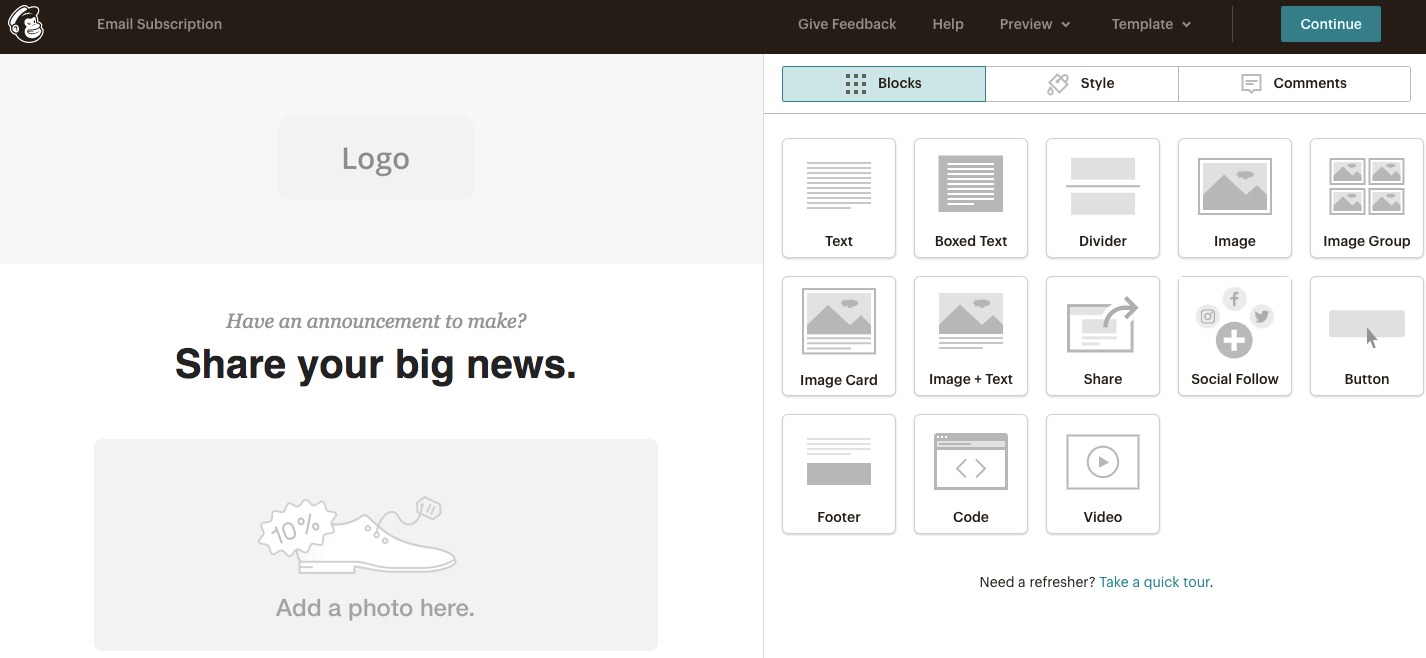
When you are done with your design, click on the template menu from the top bar and save the design as a template.

Creating an email subscription form
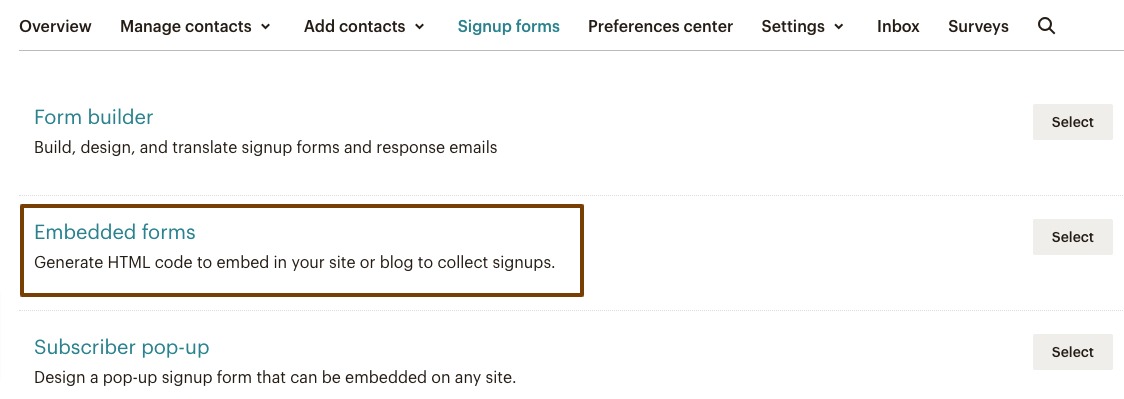
Now you need to create an email subscription form for your website. Go to your Mailchimp profile dashboard and then click on the Audience > Signup Form option.

Now click on the Embedded Form option.
Now it will show you different form styles to edit your form. You can add different features and preview them instantly. When you are done creating your form scroll down and click on the Generate Embed Code button.

It will show you the form embed code and paste it into your WordPress website to integrate it with your website.

Login to your WordPress website admin dashboard and go to Appearance > Widgets. Paste the copied code in any of the widgets where you want to display the subscription form.
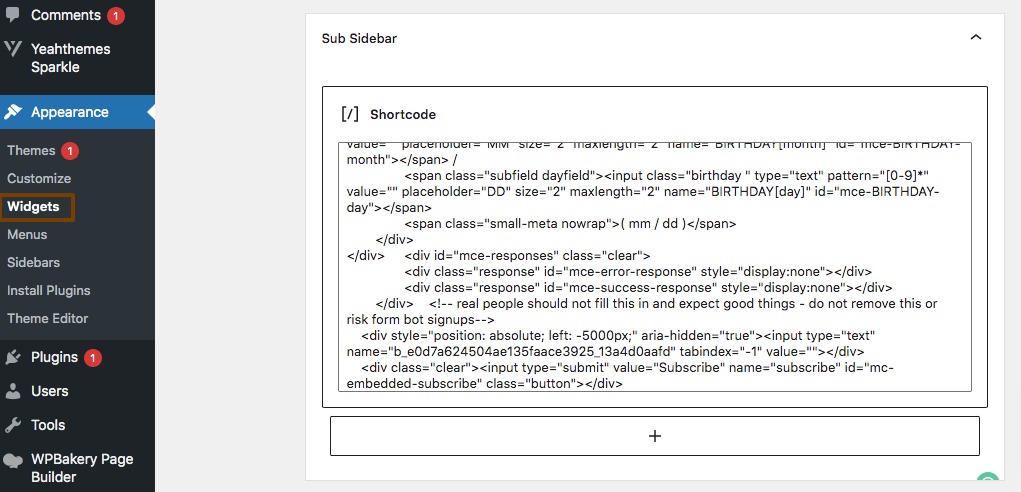
This will add the subscription form in your selected area.
Wrapping Up
Following the process, you will be able to add an email subscription to your WordPress website for free. You can see our other articles to learn How to reduce the bounce rate on the WordPress website
How to add subscriptions to WooCommerce shop
How to setup shipping classes in WooCommerce
We hope this article will help you. If you like this article, please like our Facebook Page to stay connected.